
HL7 protocol: read data from medical laboratory equipment
Problem:
We need to collect data from laboratory equipment that supports the HL7 data interchange protocol and write them to a database. Health Level Seven or HL7 refers to a set of international standards for transfer of clinical and administrative data between software applications used by various healthcare providers.
Terms of reference:
To solve this problem, we are going to use:
1. Data Logger Suite. License type: Professional, Enterprise, or a trial version.
2. HL7 Data Parser plugin.
3. SQL Database Pro, the full version (purchased separately), or the trial version.
Introduction
The HL7 protocol is widely used in medical equipment. It allows you to automatically collect measurement data and other relevant data (date, first name, and last name, the highest and the lowest values, measurement number, etc.).
Such equipment may support multiple data interchange protocols. You may need to configure your equipment to use the HL7 protocol in the equipment settings.
Our data logger software is usually used in the following areas:
- Lab Automation.
- Chemistry.
- Monitoring.
The following popular laboratory facilities are supported, among others:
- A. Menarini Diagnostics Menasoft.
- AB Sciex Mary Fuller's, QTRAP 4500.
- Abaxis Piccolo Xpress.
- Abbott Laboratories Architect.
- Affiliated Medical Services (AMS) Reference Lab.
- Alere Afinion
- Benetch PRA
- Beckman Coulter.
- Dade Behring Stratus.
- Data Innovations.
- Dirui.
- ESI Technology COAS Server.
- i-STAT.
- IL GEM Premier 3000, 4000, 5000.
- Mindray BS series.
- Nova Biomedical Stat Profile Prime.
- Roche Cobas.
- Swelab Alfa Plus.
- Tosoh AIA.
- Waters MassLynx.
More vendors are added to the supported equipment list every year, and the HL7 standard is becoming even more widespread. It means that our program can work with other equipment, too. The list above is given just as an example.
Step 1: Configure the equipment connection.
Typically, the serial port is used for connecting to the equipment. So you need to create a new configuration and configure the COM port settings (figure 1). The COM port can be either real or virtual. For example, you can obtain data via an RS232-to-USB adapter. The connection parameters depend on equipment settings.

Figure 1a. COM port settings
If you connect your HL7-compatible instrument via TCP, there are two modes "Server" and "Client". You should configure our software as a client (fig. 1b) if your instrument works as a host (you cannot configure a destination IP address). If you cannot configure the TCP port number in your instrument settings, it should be specified in a device's manual.

Figure 1b. TCP client settings
You should configure our software as a server (fig. 1c) if you can configure a destination IP address to send HL7 data in your instrument. In this mode, your instrument initiates a connection and the logger listens for incoming data.

Figure 1c. TCP server settings to receive HL7 data
Step 2: Select a data parser for the HL7 protocol.
You need to select the HL7 module as a parser (figure 2). You may download the HL7 parser here if it does not exist in the list. You don't need to configure any additional settings for the parser.

HL7 data parser
Figure 2. Selecting the HL7 data parser
Step 3: Select and configure the data export module.
For example, here, you can see how you can export data to an MS SQL database running on the same computer.
Before you can do that, you need to use SQL Server Management Studio to create a database table. Possibly, you will also want to create a separate database. You can download a sample SQL script for creating a database table from here.
Then you need to enable the SQL Database Pro data export module (figure 3) and configure the database connection (figure 4).
After that, add an SQL query for writing data to the queue and bind parser variables to the SQL query parameters (figure 5). You can download a sample SQL script for inserting data from here or load a preconfigured queue from the file.

Figure 3. The data export module
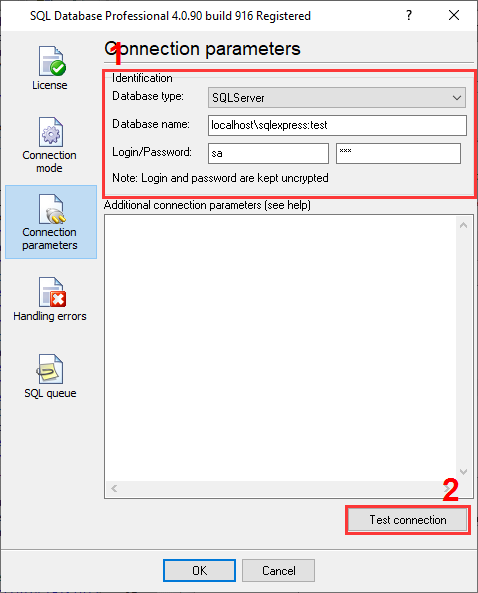
Figure 4. Connection settings

Figure 5. SQL queue
Then save all the changes (click "OK" in each settings window, which will also close the window).
You may download the backup copy of this configuration here and restore it from the "File" menu in the main window.